codeigniter vuejs
Codeigniter와 Vue cli 3 같이 쓰기
Codeigniter는 간단한 PHP MVC 프레임워크임. 간단하기 쓰기엔 가볍고 MVC 패턴이 확실하게 구분되어 있어서 얘만 사용하기엔 편하다.
근데 frontend에서 액션이나 웹페이지 구성이 필요할 땐 php에 html, javascript만 쓰기엔 부족한 느낌…
vuejs랑 vuetifyjs를 cdn으로 쓰고 있었지만 패키징해서 사용해보기로 시도함
1. codeigniter 4 다운로드
여기선 menual installation 방법을 사용하려고 한다.
다운로드 받아서 압축을 풀면 끝
아파치랑 연동해도 되고 그냥 개발용 서버를 띄울 수 있다.
2. Backend 서버 시작
압출 풀고
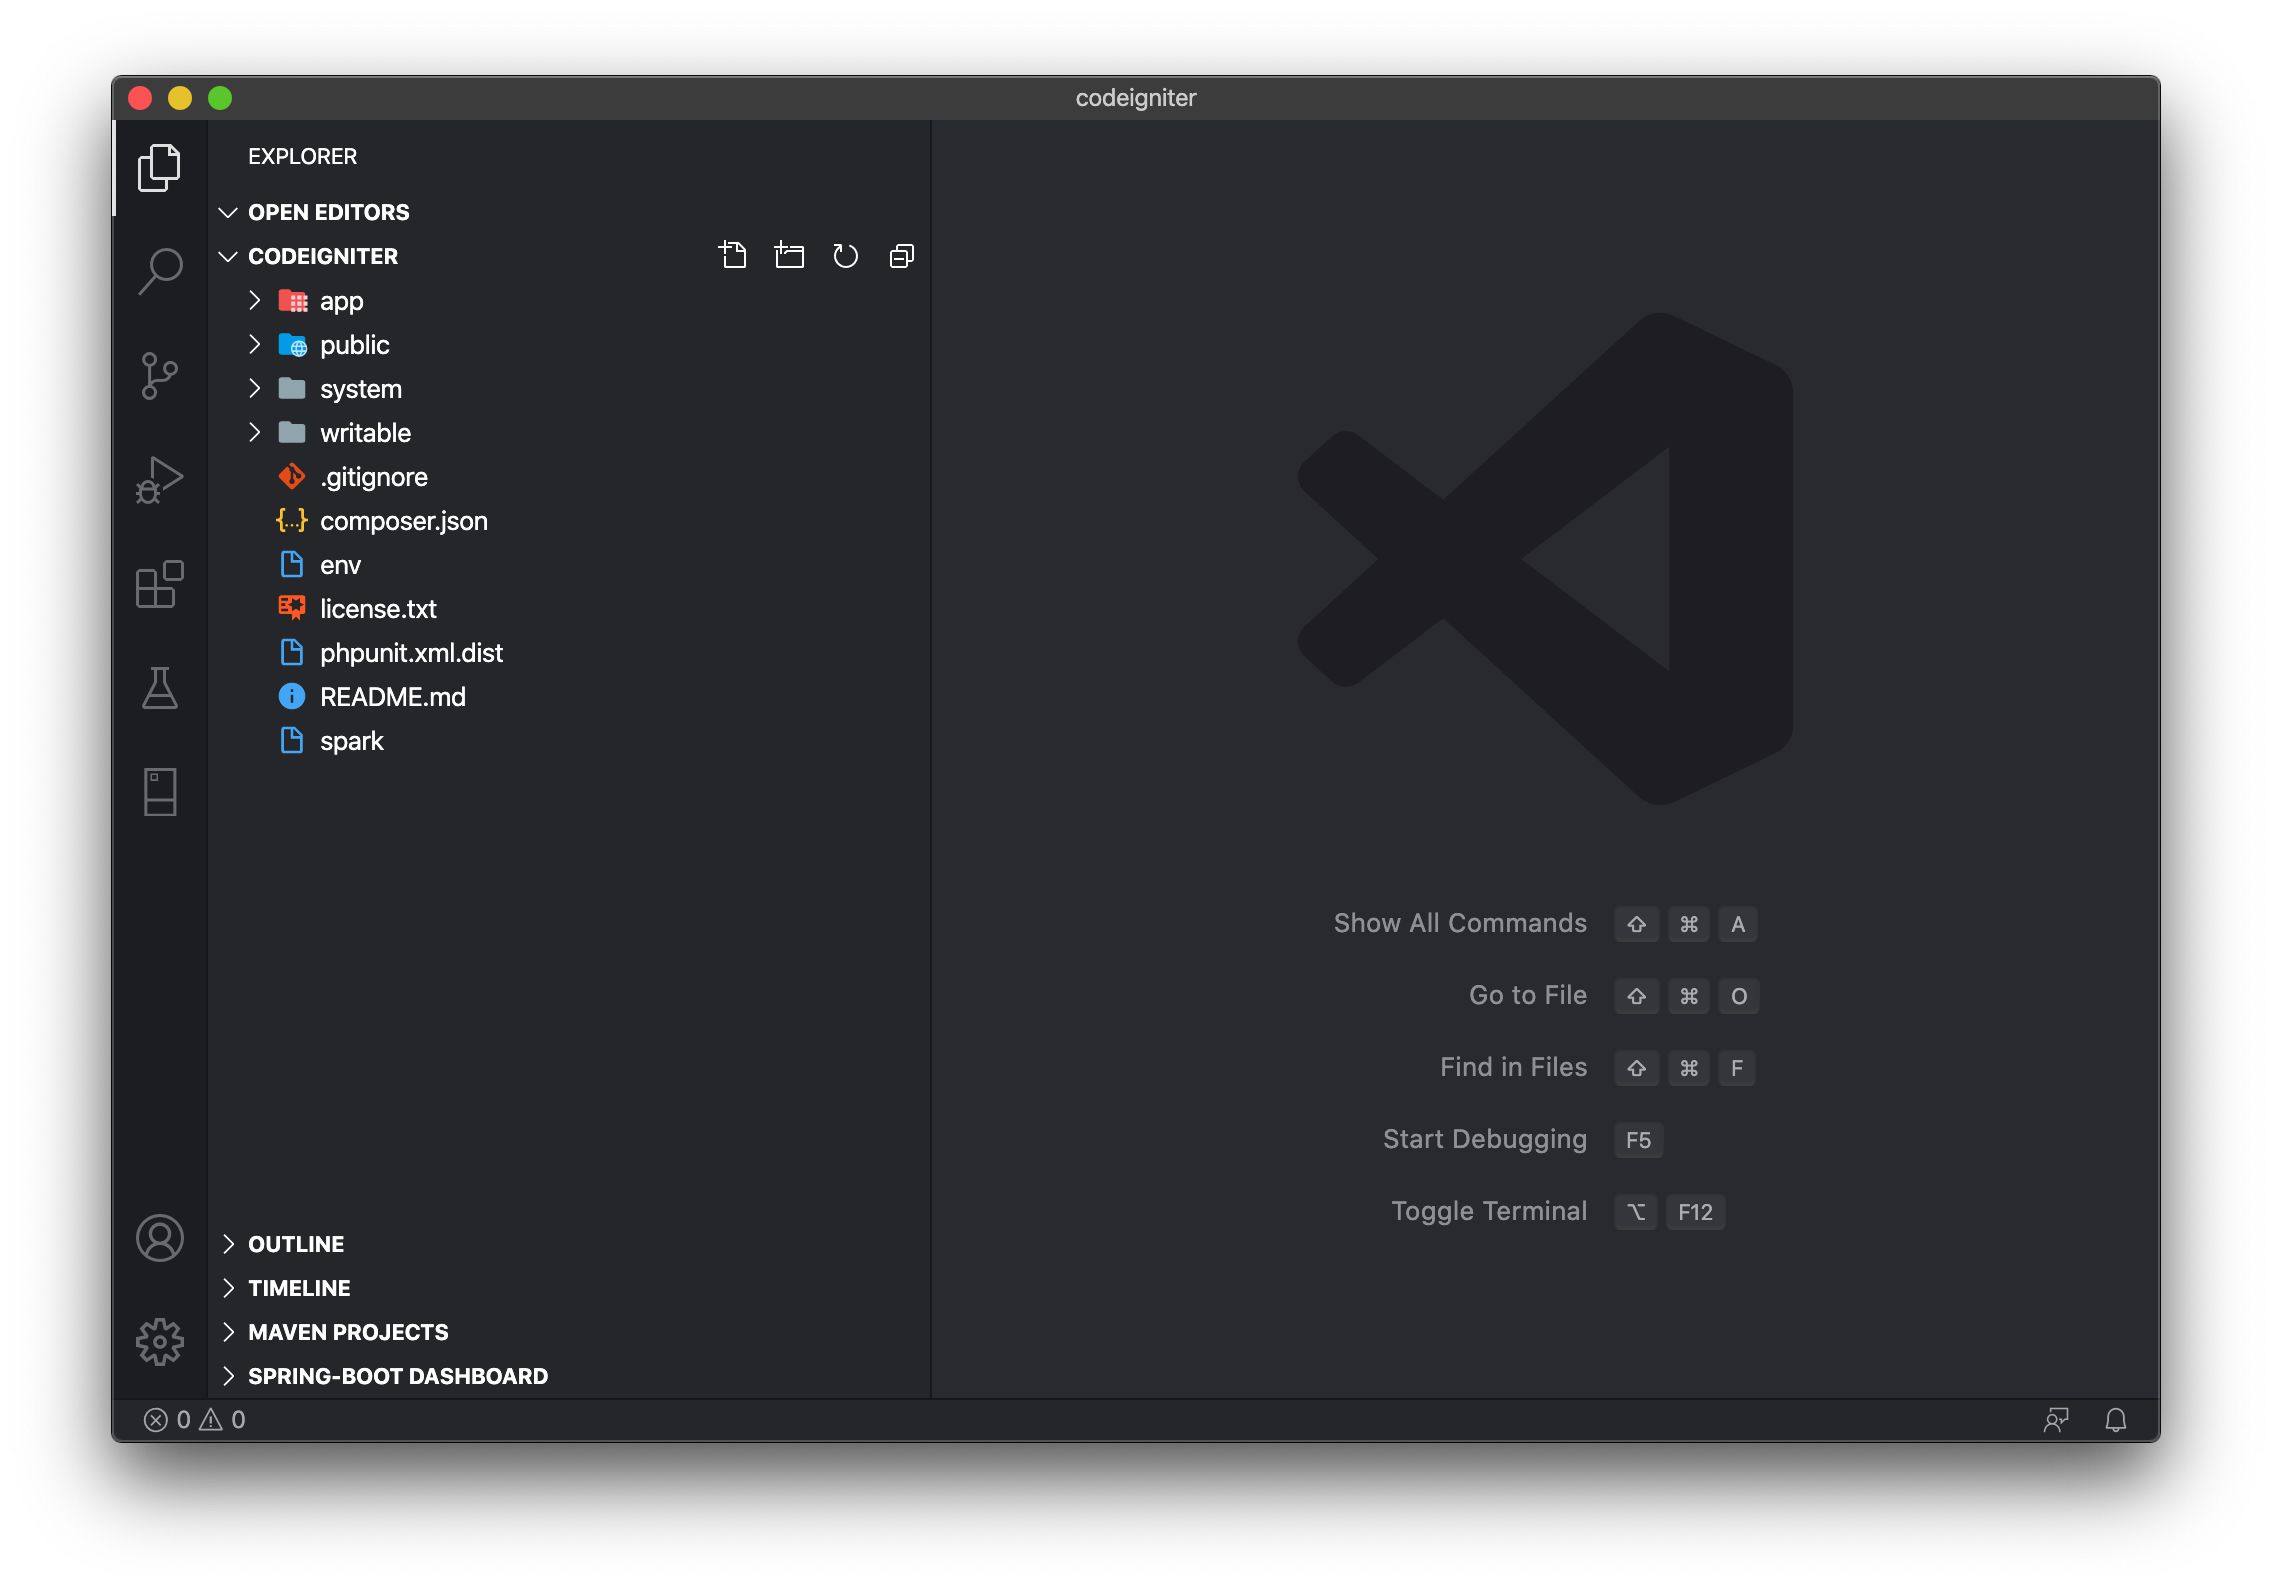
압축을 풀면 이런 디렉터리 구조인데 우선은 app, public만 보자
- app : CI 구성하는 config라던지 MVC 패턴을 이루는 항목들과 필요한 library 를 모아둔 디렉터리
- public : web root 디렉터리. index.php로 CI 프로젝트의 시작점이 될 정적파일 디렉터리
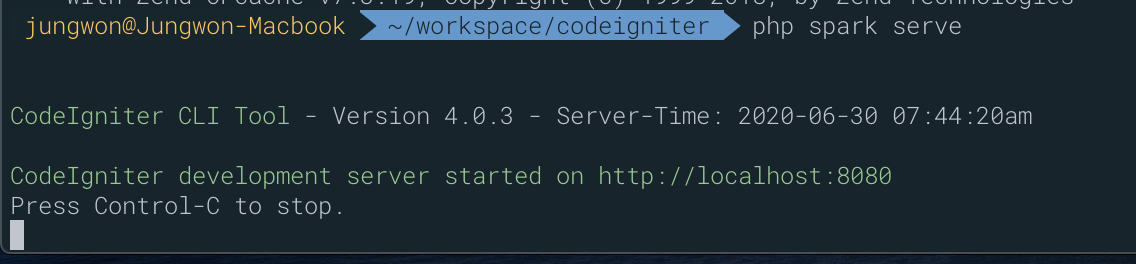
서버 구동
1 | cd codeigniter # 다운받은 codeigniter 폴더 |
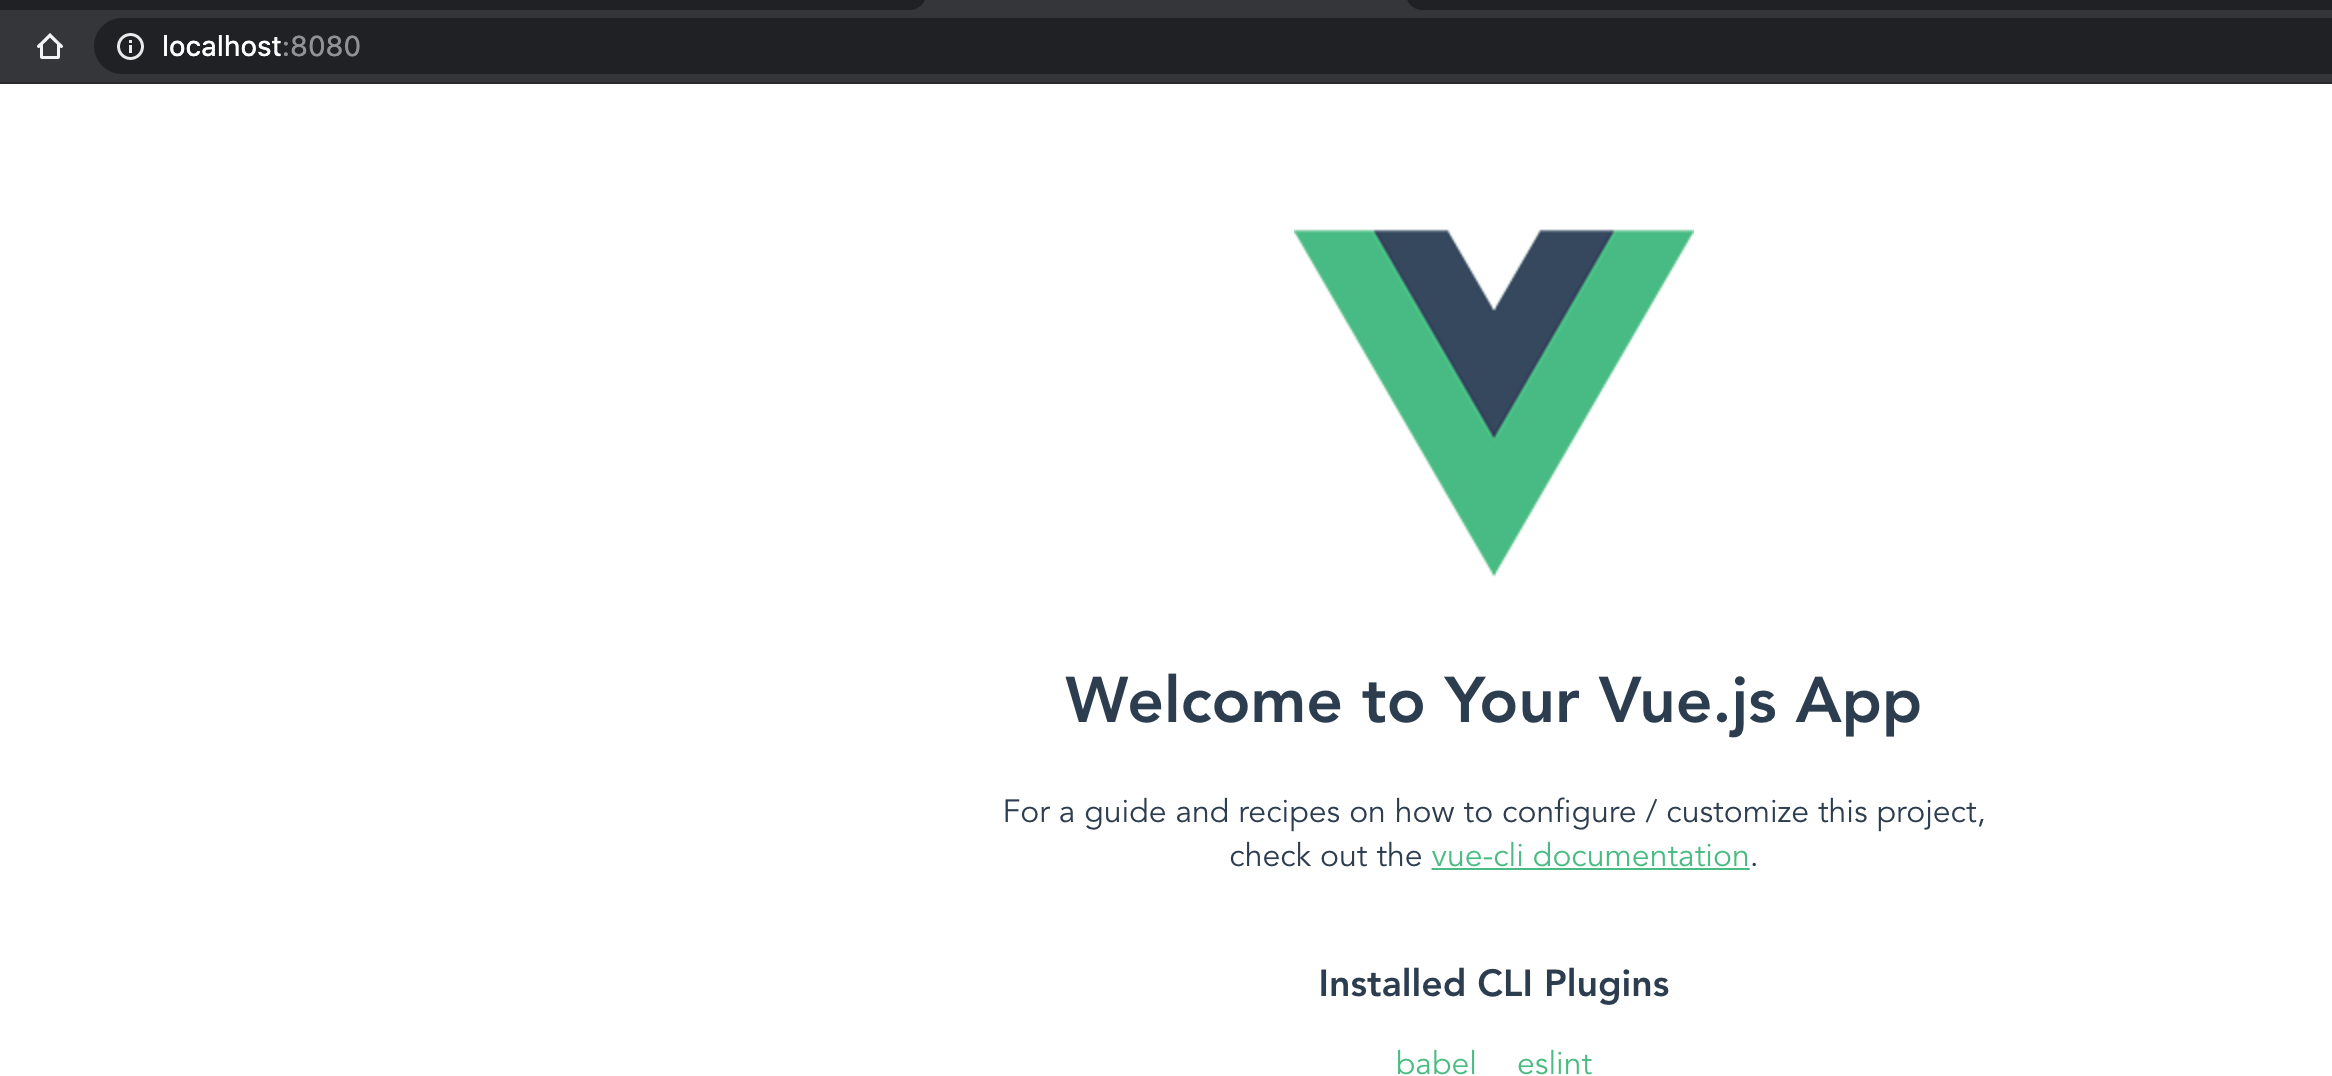
웹으로 확인하면 welcome 페이지가 뜬다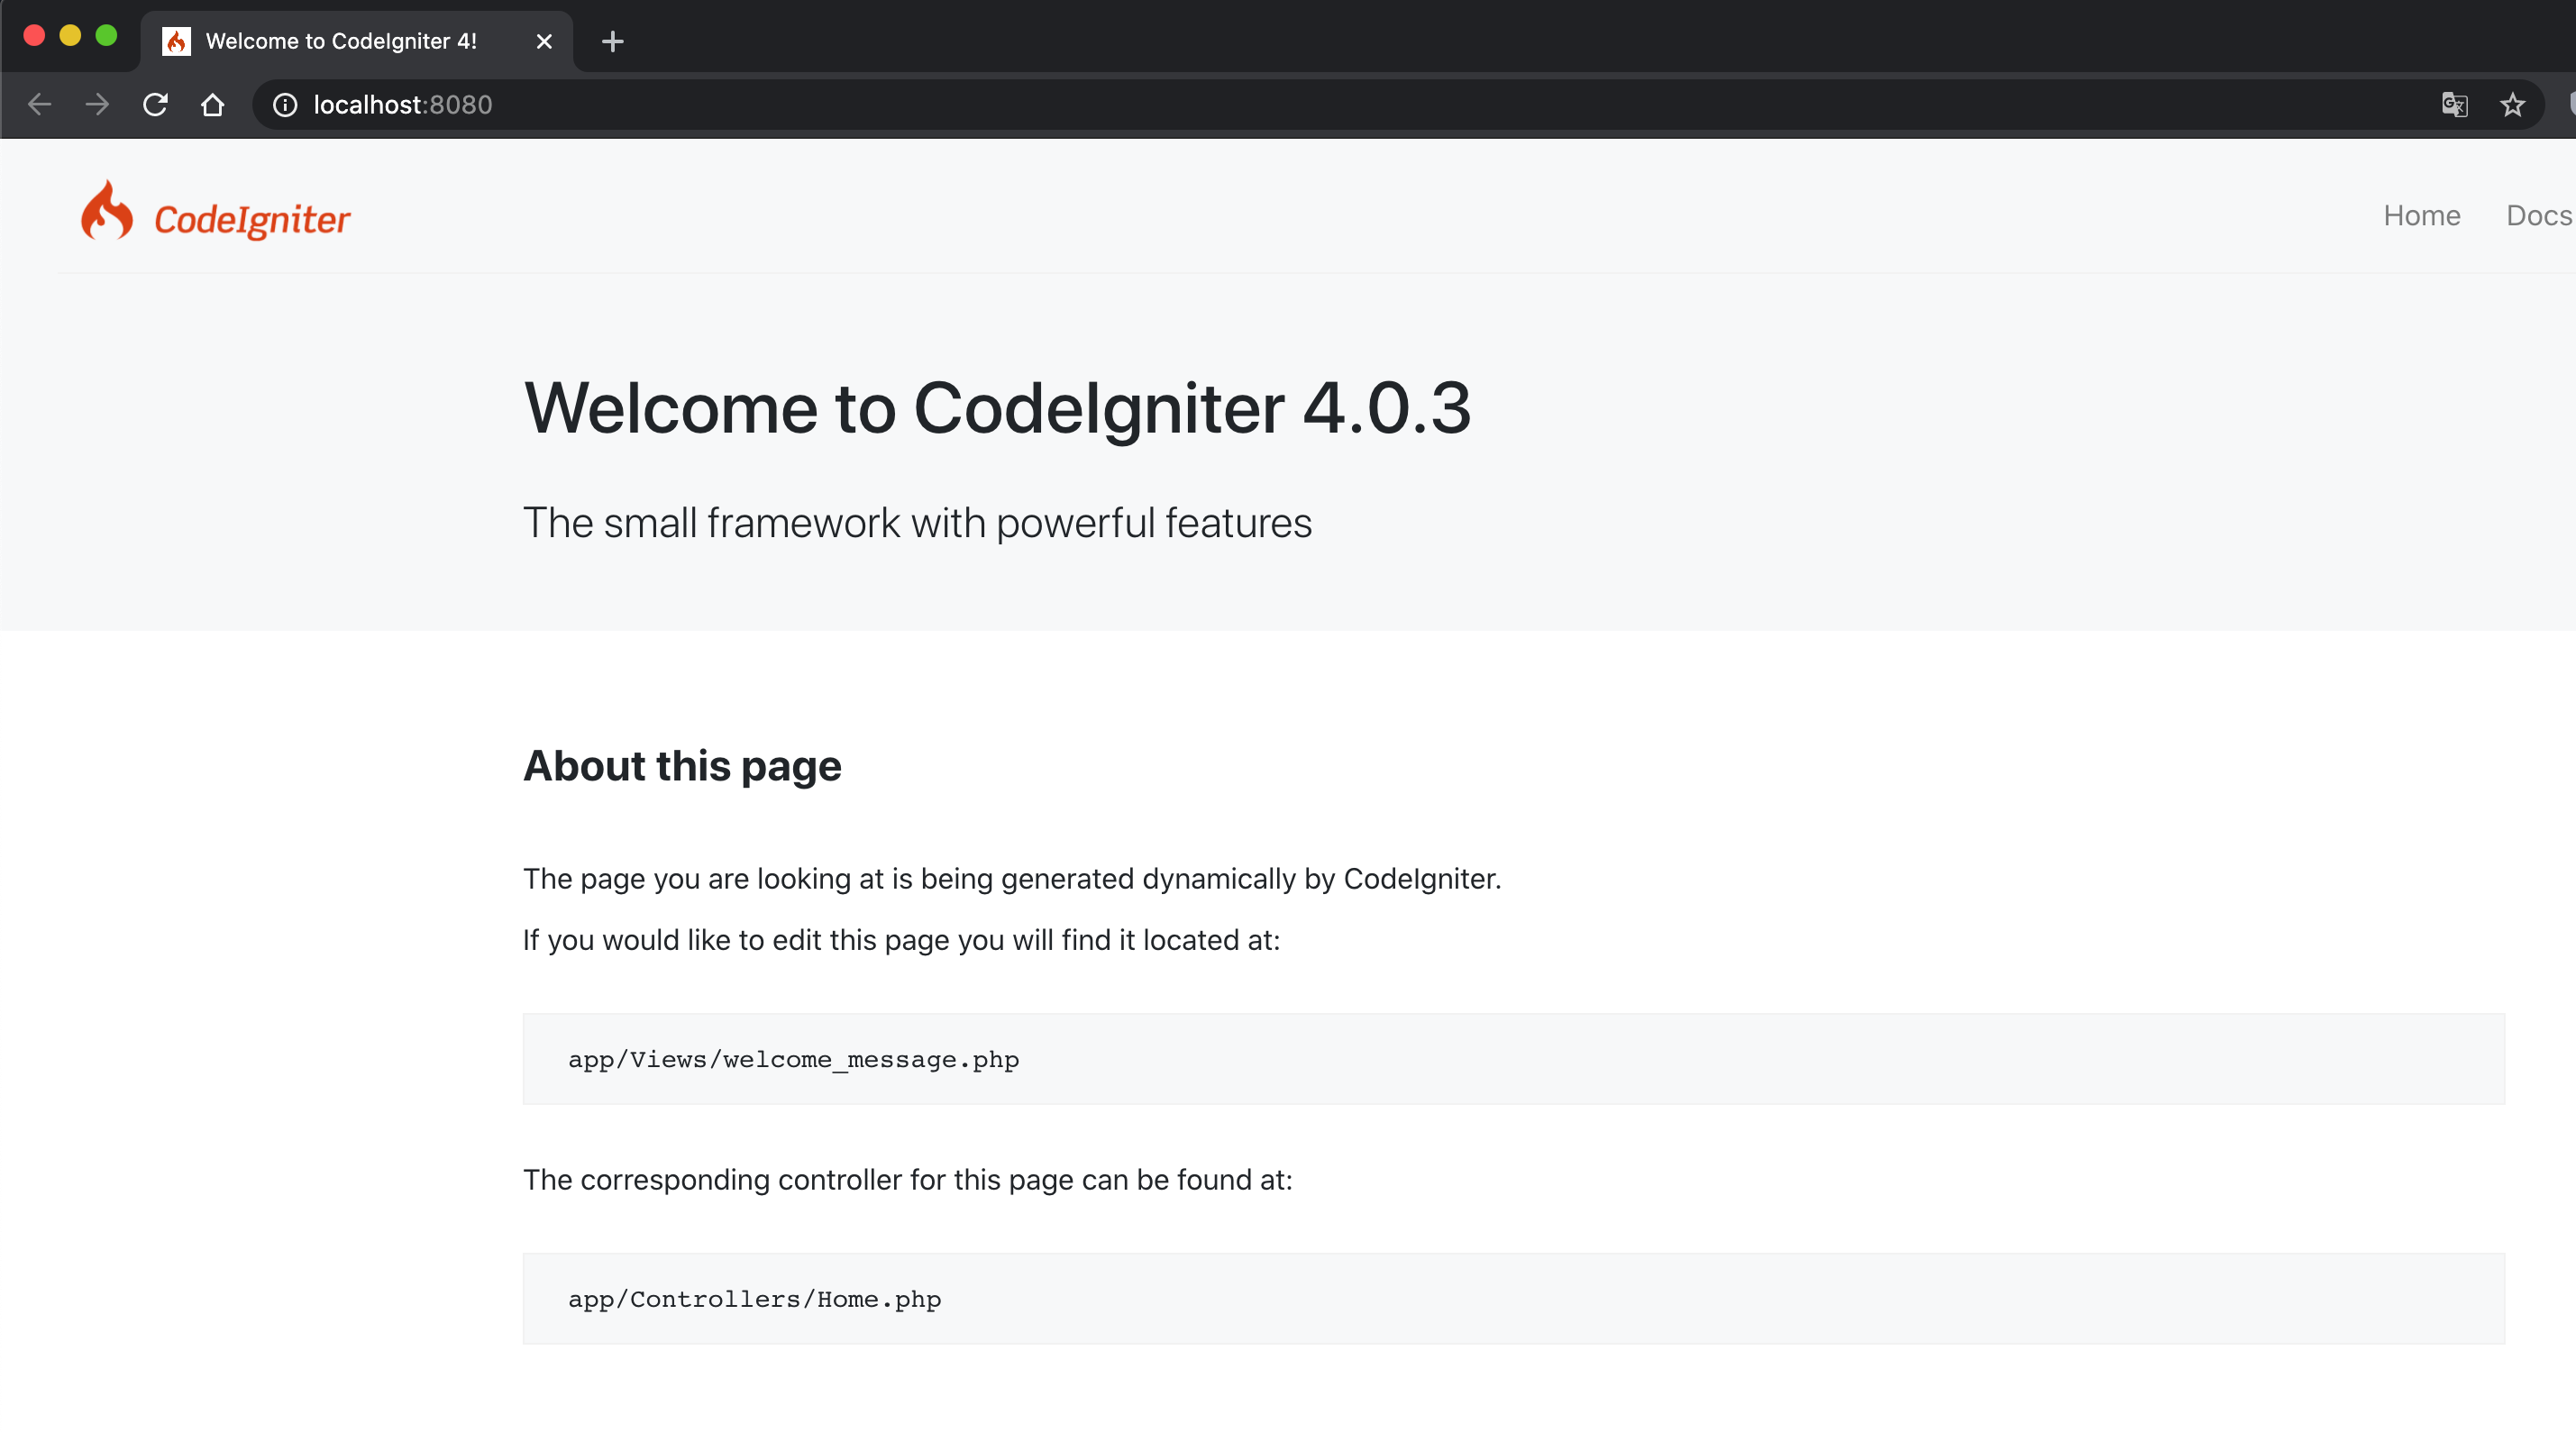
3. Frontend 서버 생성
Vue CLI
1 | brew install npm |
vue create 로 생성하면 선택하는 항목이 나오는데 대부분 recommend 옵션이나 default 옵션으로 선택
4. Frontend 서버 시작
1 | cd frontend |
여러 의존성 확인하고 다운하고 아래처럼 실행된다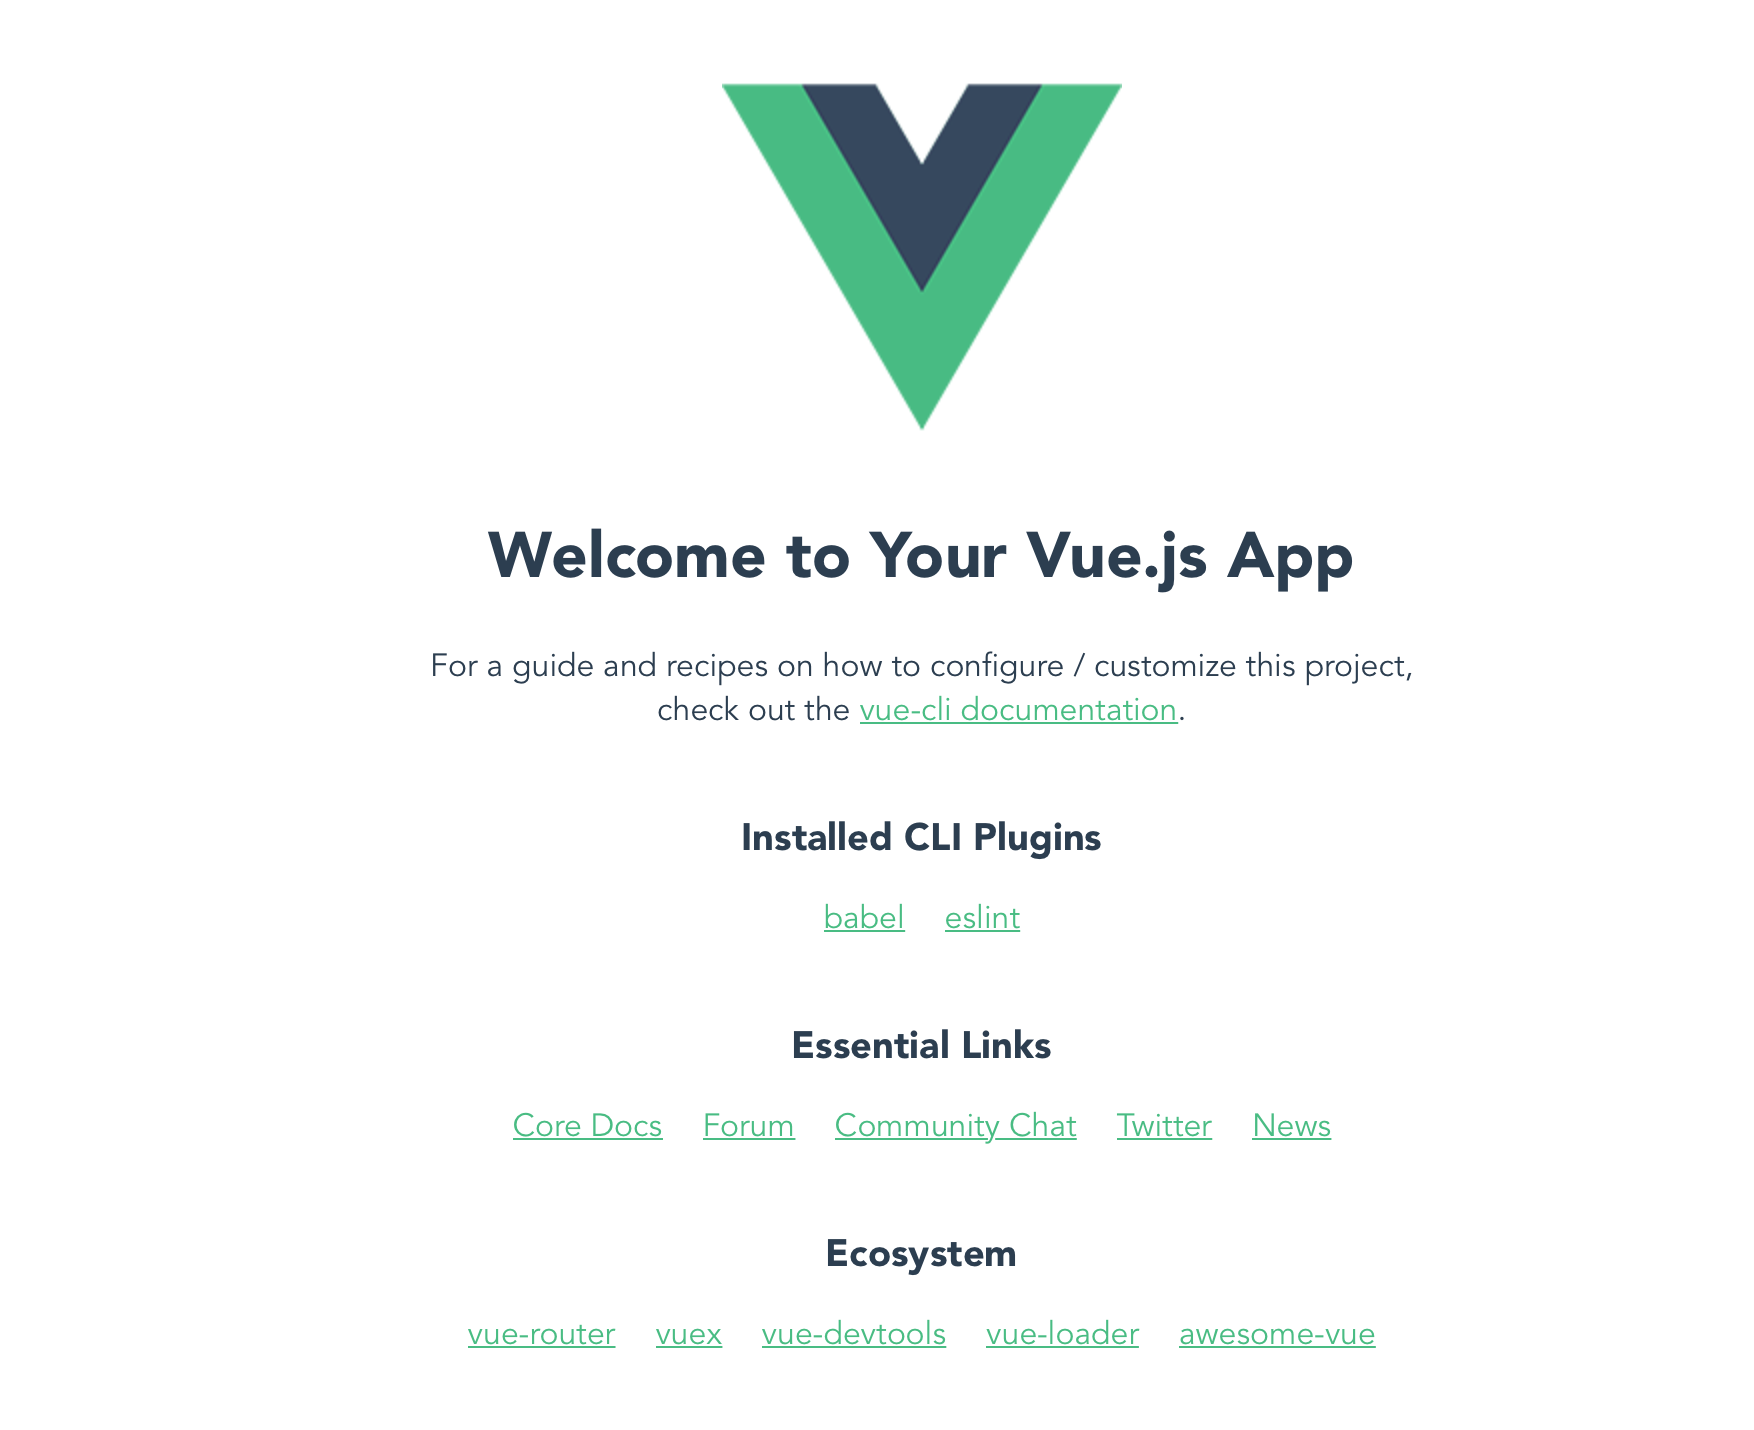
5. frontend/vue.config.js 수정
npm run serve 를 중지(ctrl + c) 시키고 vue 프로젝트의 설정을 변경해준다.
frontend/vue.config.js 기본생성되지 않아서 새로 파일을 만들고 아래 설정 추가
1 | const path = require("path"); |
6. app/Controllers/Home.php 수정
CI가 기본 디폴트 라우터 (메인페이지)를 Home Controller로 잡고 있다.
여기서는 frontend에 의해 빌드된 파일들을 CI에서 불러와 웹에서 확인할 수 있게만 설정
1 | namespace App\Controllers; |
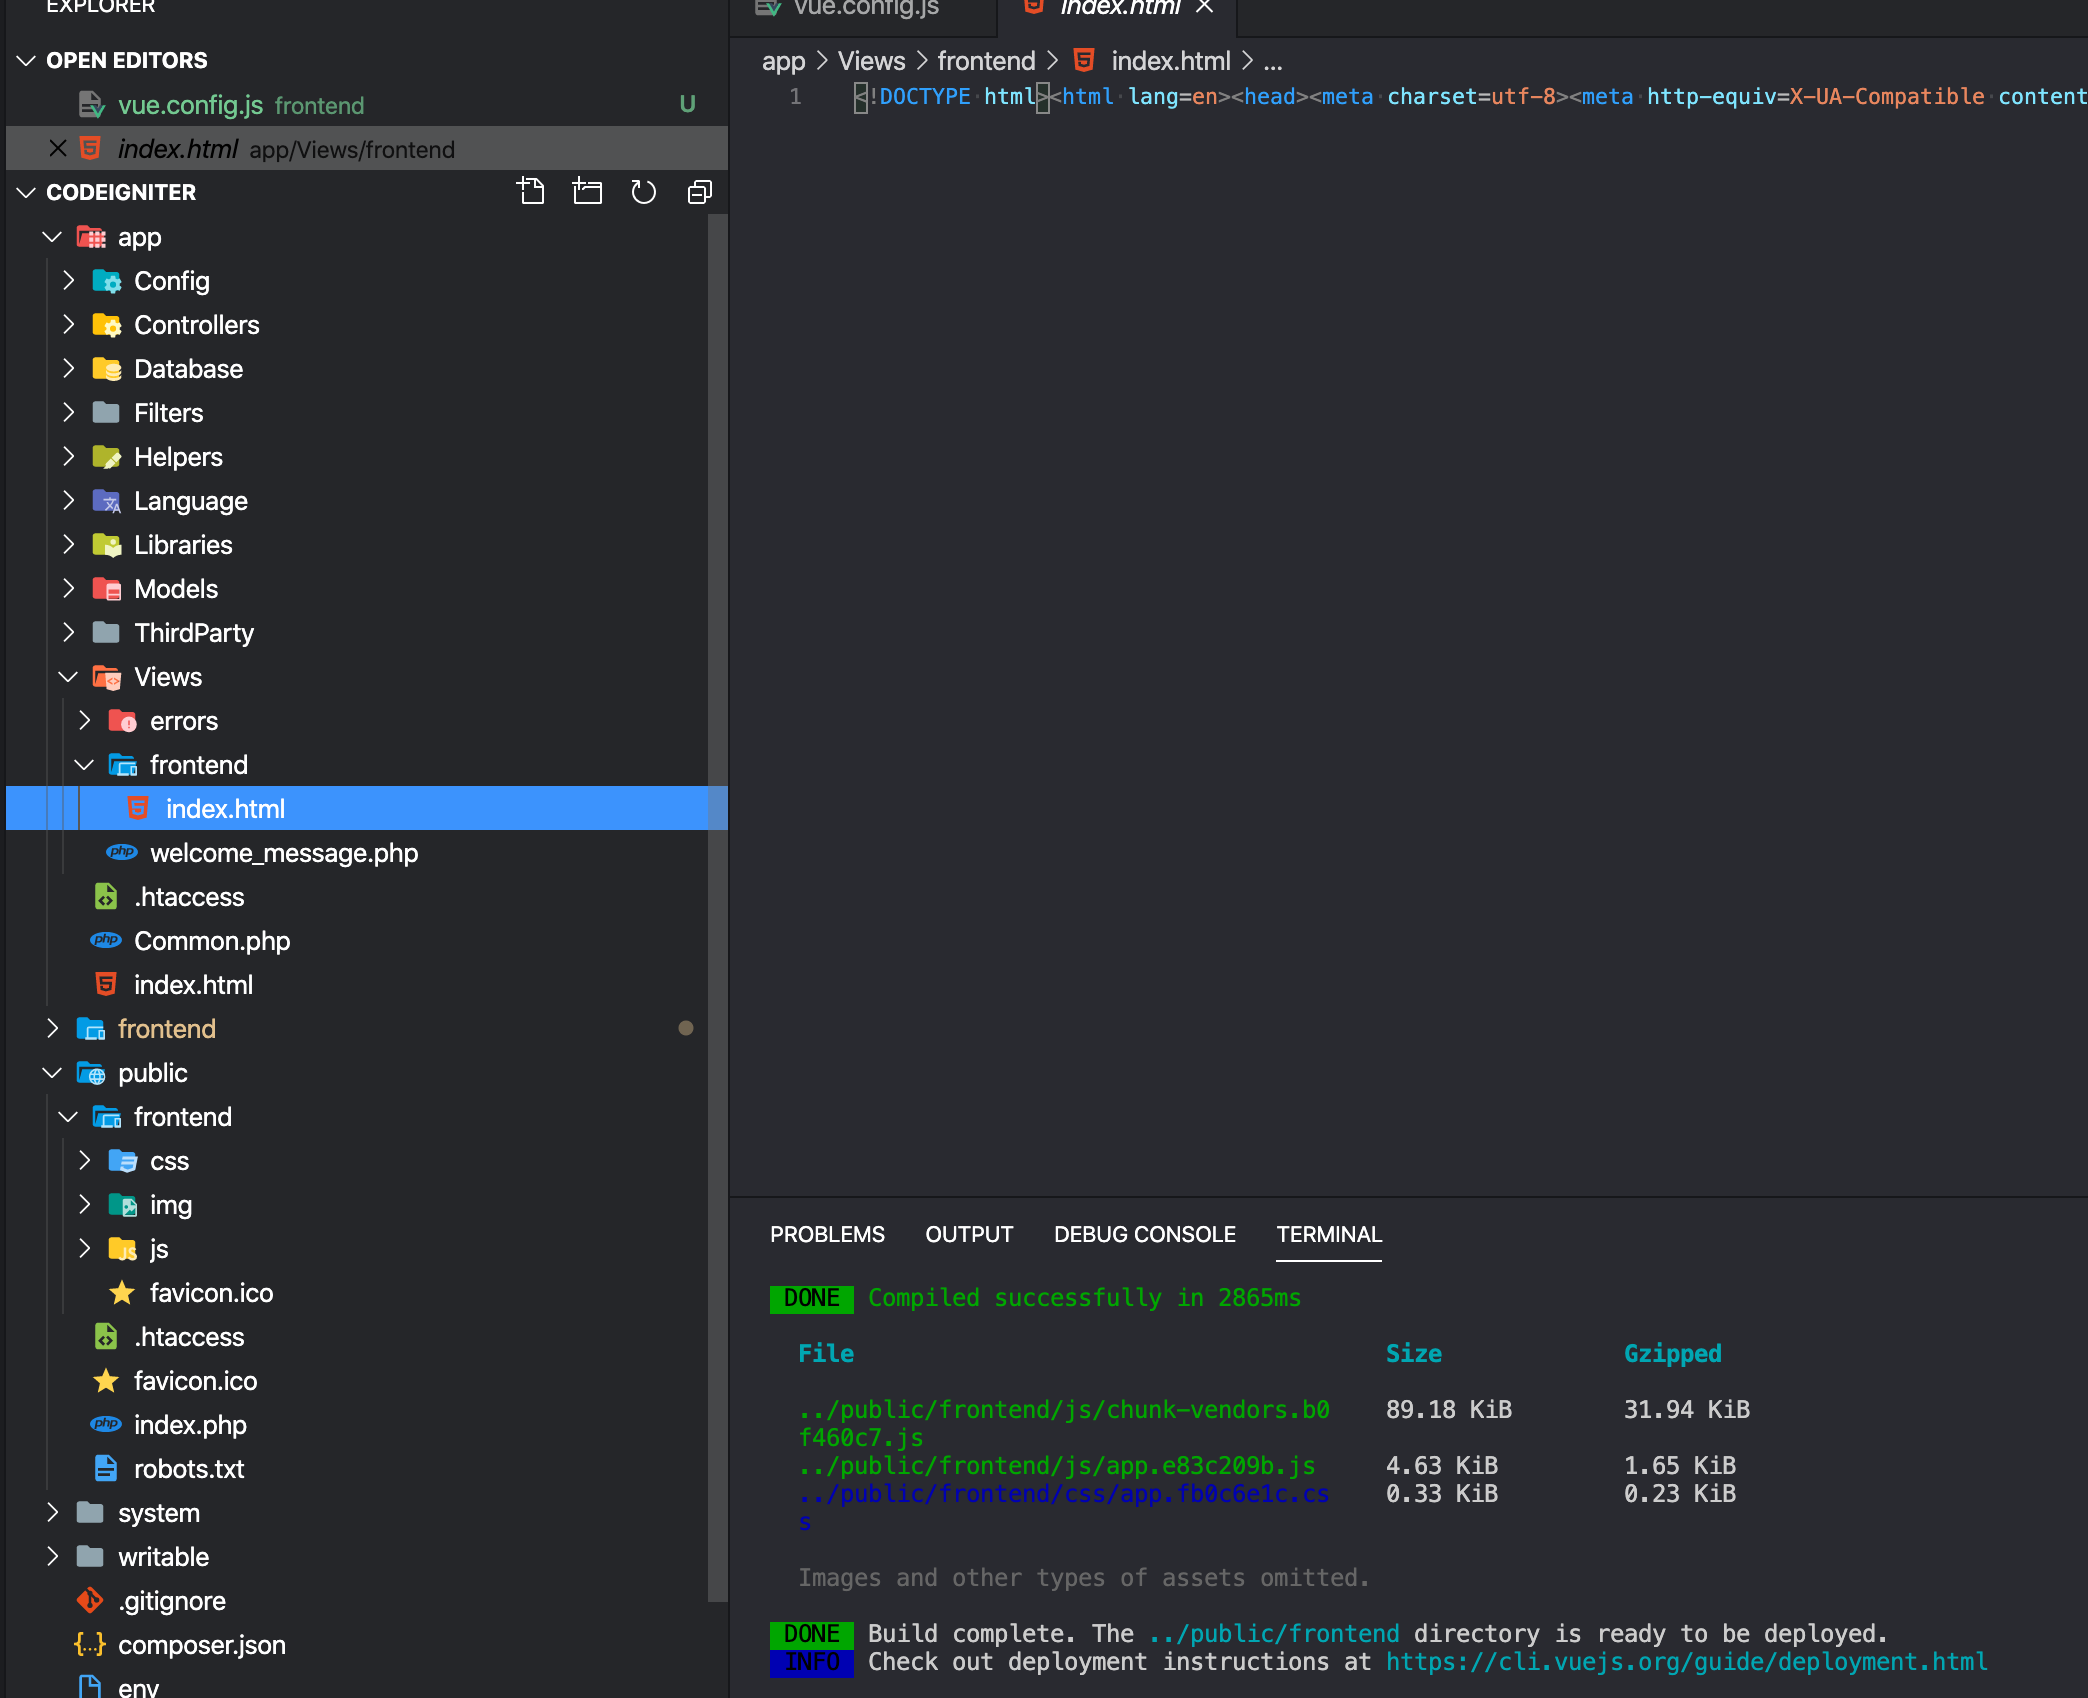
7. Frontend Build
frontend 폴더에서
1 | npm run build |
이 항목들이 생김
- codeigniter/app/Views/frontend/index.html
- codeigniter/public/frontend/css
- codeigniter/public/frontend/js
- codeigniter/public/frontend/img
- codeigniter/public/frontend/favicon.ico
8. codeigniter 로 접속해보면
http://localhost:8080 으로 접속해 보면 아까 php spark serve 로 접속한 페이지와는 다르게 vue 로 만든 페이지가 뜨는걸 확인